A common issue that many homeowners face is garbage disposal leaking from the bottom. This issue can lead to water damage, unpleasant odors, and even potential damage to the appliance itself. In this article, I’ll explore the causes behind this issue and provide you with some simple and effective fixes to ensure your garbage disposal works flawlessly.
What Causes A Garbage Disposal To Leak From The Bottom
There are the following causes of Garbage Disposal Leaking from the Bottom.
A. Age and Wear
Over time, garbage disposal units are subject to wear and tear due to regular use. This aging process can lead to several factors contributing to leaks:
- Internal Component Deterioration: As a disposal unit ages, its internal components, such as blades, motor parts, and seals, can deteriorate. Continuous exposure to moisture and food particles can cause these components to wear down, potentially leading to gaps or weaknesses in the system that allow water to escape through the bottom.
- Seal Degradation: The rubber seals used in garbage disposals may lose their elasticity and effectiveness over time. This can result in compromised seals, particularly around connections and mountings, allowing water to seep through.
- Corrosion: Long-term exposure to moisture, acidic food waste, and minerals in water can lead to corrosion on both the interior and exterior surfaces of the garbage disposal. Corrosion can weaken the unit’s structure, leading to cracks or openings through which water can leak.
- Loosened Connections: Over the years, various connections within the disposal unit, including plumbing joints and fasteners, may gradually loosen due to vibrations and frequent use. These loose connections can facilitate water leakage, especially from the bottom, which is a vulnerable area in the system.
- Worn-Out Gaskets: Gaskets, which are used to create watertight seals in specific parts of the disposal, may lose their flexibility and integrity as the disposal ages. This can result in inadequate sealing and, consequently, leaks.
B. Loose or Damaged Seals
Seals within a garbage disposal play a critical role in maintaining the unit’s integrity and preventing leaks. These seals are typically made of rubber or similar materials and are strategically placed at various points within the disposal system. Their significance lies in their ability to create watertight barriers and maintain separation between different components of the disposal. Here’s why these seals are important:
- Water Containment: Seals prevent water from entering areas of the disposal unit where it shouldn’t be. Some internal components of the disposal should not be exposed to moisture, and water can accelerate their deterioration.
- Preventing Food and Debris Escape: Seals keep ground-up food waste and debris contained within the disposal. When seals fail, bits of food can escape, leading to plumbing clogs and potential odors.
- Electrical Safety: In many garbage disposals, electrical wiring and components are present. Seals act as barriers to prevent water from reaching these electrical parts, reducing the risk of electrical shorts, shocks, or damage to the unit.
How loose or damaged seals can cause leaks?
When seals within garbage disposals become loose or damaged, they compromise the containment barriers that prevent water and waste from escaping. This can lead to leaks in the following ways:
- Water Seepage: Loose seals may allow water to seep through gaps or openings between components, leading to noticeable leaks.
- Food and Debris Escape: Damaged seals may fail to contain food particles and debris effectively. Consequently, these particles can accumulate in areas where they shouldn’t, potentially causing blockages and increased pressure within the disposal, contributing to leaks.
- Electrical Exposure: Loose or damaged electrical seals can allow water to penetrate sensitive electrical components, posing safety hazards and potentially leading to electrical malfunctions.
- Corrosion Risk: Escaping water due to damaged seals can contribute to corrosion within the disposal unit, further weakening its structural integrity and potentially causing leaks.
C. Cracked Housing
The housing of a garbage disposal unit may develop cracks for several reasons, including:
- Impact: Accidental impacts or heavy usage can cause physical damage to the housing, resulting in cracks or fractures.
- Corrosion: Prolonged exposure to moisture and food particles can weaken the housing’s structural integrity, making it susceptible to cracks.
- Age: Over time, the materials used in the housing may deteriorate, becoming more prone to developing cracks.
- Improper Installation: Inadequate installation or mounting of the disposal unit can put stress on the housing, potentially leading to cracks over time.
D. Corrosion
Corrosion occurs when metal surfaces are exposed to moisture, especially when combined with acidic substances like food waste. In the context of garbage disposal:
- Moisture Exposure: The disposal unit is constantly exposed to water as part of its normal operation. Moisture can penetrate the metal components, initiating the corrosion process.
- Acidic Food Waste: Many types of food waste are acidic, and when they come into contact with metal components, they can accelerate the corrosion process.
- Mineral Deposits: Minerals present in tap water can contribute to corrosion over time, especially in regions with hard water.
Corrosion can weaken the structural integrity of the disposal unit, leading to the development of cracks and openings through which water can escape, resulting in leaks.
E. Improper Installation
Proper installation of a garbage disposal unit is critical for preventing leaks and ensuring its long-term functionality. Several factors emphasize the importance of correct installation:
- Seal Integrity: A correctly installed disposal unit will have seals, gaskets, and connections properly fitted, reducing the risk of leaks.
- Alignment: Proper alignment during installation ensures that all components fit together snugly, reducing stress on the housing and preventing potential cracks.
- Secure Mounting: A securely mounted disposal unit is less likely to shift or vibrate during use, which can help maintain the integrity of seals and connections.
- Reduced Strain: Proper installation minimizes strain on the disposal unit’s components, extending its lifespan and reducing the risk of wear and tear.
Conversely, improper installation can lead to misalignment, loose connections, and stress on the unit, increasing the likelihood of leaks over time.
Understanding these common causes of bottom leaks in garbage disposals is crucial for homeowners to diagnose, address, and prevent these issues effectively. Regular maintenance, timely repairs, and professional installation can go a long way in ensuring the optimal performance and longevity of your garbage disposal unit.
Diagnosing Garbage Disposal Leaking from the Bottom
Steps for identifying the source of the leak:
Turning off the power supply for safety:
- Before attempting to diagnose or fix a leaking garbage disposal, it is absolutely crucial to ensure your safety by turning off the power supply to the unit. You can do this by locating the disposal unit’s electrical switch or circuit breaker and switching it off. Safety is paramount when dealing with electrical appliances, and this step prevents the risk of electrical shocks or accidents.
Drying the area:
- Once you’ve safely turned off the power supply, the next step is to dry the area around the garbage disposal. Use towels or a dry cloth to wipe the exterior of the disposal unit and the pipes beneath it. Removing any existing moisture will make it easier to spot new water leaks during the diagnostic process.
Running water to locate the leak:
- With the area dry and the power supply off, you can now proceed to identify the source of the leak. Turn on the cold water faucet and allow a slow, steady stream of water to flow down the sink drain. As water flows into the disposal unit, carefully observe the bottom of the disposal, the connections, and the surrounding plumbing for any signs of moisture or dripping water.
- Take your time during this step. Leaks may not always be immediately visible, so watch closely for any emerging droplets or pooling water.
- Pay special attention to areas where the disposal unit connects to the sink and the plumbing beneath it. These are common areas where leaks may occur.
- If you notice water escaping from any part of the disposal unit or its connections, it’s a strong indicator of the source of the leak.
By following these steps, you can systematically identify the source of the leak in your garbage disposal unit. Remember to prioritize safety by ensuring the power supply is turned off before proceeding with the diagnostic process. Once you’ve pinpointed the source of the leak, you can proceed with the necessary repairs or seek professional assistance if needed to address the issue effectively.
How To Fix A Leaking Garbage Disposal From The Bottom
A. Tighten Loose Connections
Tightening loose connections in a garbage disposal is a straightforward process that can often resolve leaks. Here’s a step-by-step guide:
- Turn Off Power: Begin by ensuring the power supply to the disposal unit is switched off. Safety is paramount when working with electrical appliances, and this precaution prevents any accidental activation.
- Identify Loose Connections: Carefully inspect the disposal unit and the surrounding plumbing for loose connections. These may include loose nuts, bolts, or pipe fittings.
- Use the Right Tools: Depending on the type of connection, you may need an adjustable wrench, pliers, or a pipe wrench. Choose the appropriate tool for the job.
- Secure Connections: Gently but firmly tighten any loose connections by turning them clockwise. Be cautious not to overtighten, as this can damage the components.
- Check for Leaks: After tightening all identified loose connections, turn the power supply back on and run water through the disposal unit to check for leaks. If the leaks persist, proceed to the next steps for further diagnosis and repairs.
B. Replace Seals
Worn-out or damaged seals are a common cause of leaks in garbage disposals. Replacing them is a relatively simple process:
- Safety First: Always turn off the power supply to the disposal unit before working on it to ensure your safety.
- Disassemble the Unit: To access the seals, you may need to disassemble the disposal unit. Follow the manufacturer’s instructions for disassembly, which may involve removing the mounting bracket, drain flange, and other components.
- Identify the Seals: Locate the seals that need replacement. These are typically found around the disposal’s connections and may include flange gaskets and splash guards.
- Remove Old Seals: Carefully remove the old, worn-out seals. This can usually be done by gently prying them off with a flathead screwdriver.
- Install New Seals: Replace the old seals with new, identical seals. Ensure they are properly seated and secure in their respective locations.
- Reassemble the Unit: Put the disposal unit back together following the manufacturer’s instructions, making sure all connections are snug but not over-tightened.
- Test for Leaks: Turn the power supply back on and run water through the disposal to check for leaks. If there are no leaks, you have successfully replaced the seals.
C. Patching Cracks
In cases where the housing of the garbage disposal has developed cracks, temporary patching can be done until a more permanent solution is sought:
- Safety Precautions: As always, ensure the power supply is turned off to prevent electrical accidents.
- Clean the Area: Thoroughly clean the cracked area, removing any debris or moisture. This will ensure better adhesion for the patching material.
- Select a Patching Material: Common materials for temporary patches include epoxy putty or plumber’s putty. Follow the manufacturer’s instructions for preparation.
- Apply the Patch: Using your selected patching material, fill the crack and smooth it out evenly. Make sure the patch extends beyond the crack to create a watertight seal.
- Allow to Cure: Follow the recommended curing time for the patching material. This may vary depending on the product.
- Test for Leaks: Once the patch has cured, turn the power supply back on and run water through the disposal unit. Check for any signs of leaks. Keep in mind that this is a temporary solution, and a more permanent fix may be required in the long term.
D. Preventing Corrosion
Preventing corrosion is essential for the long-term health of your garbage disposal:
- Regular Cleaning: Clean the disposal unit regularly by grinding ice cubes or small citrus fruit peels to help remove food residue and minimize corrosion.
- Use Baking Soda and Vinegar: Periodically, mix baking soda and vinegar and pour it into the disposal. Let it sit for a few minutes, then run cold water to clean the disposal and reduce corrosion.
- Avoid Harsh Chemicals: Refrain from using harsh chemical cleaners, as they can damage the disposal and exacerbate corrosion.
- Keep it Dry: After each use, ensure that the disposal is dry and free from food debris. This will prevent prolonged exposure to moisture, which can accelerate corrosion.
E. Professional Help
Seeking professional assistance is advisable in the following situations:
- Persistent Leaks: If you’ve attempted to diagnose and fix the leak, but it persists, it’s a clear sign that a more complex issue may be at play, and professional expertise is needed.
- Electrical Problems: If you suspect or encounter electrical issues within the disposal unit during your inspection or repair attempts, it’s imperative to consult a qualified electrician or appliance repair technician.
- Structural Damage: If the housing of the disposal unit is significantly cracked or damaged, it may require replacement, which should be handled by a professional.
- Safety Concerns: If you ever feel unsafe while working on your garbage disposal, especially when dealing with electrical components or plumbing connections, it’s best to seek professional help to ensure your safety and prevent accidents.
Fixing leaks in garbage disposal involves a series of steps, including tightening loose connections, replacing seals, patching cracks, preventing corrosion through regular maintenance, and knowing when it’s best to seek professional assistance. Following these steps carefully can help you address leaks effectively and maintain the proper functioning of your garbage disposal.
Garbage Disposal Leaking From Bottom Reset Button

If your garbage disposal is leaking from the bottom and you’re looking for guidance on how to address the issue, it’s important to note that a reset button is typically not related to leaks. The reset button on a garbage disposal is designed to reset the motor in case it becomes overloaded or trips a safety mechanism.
However, if you have identified a leak in your garbage disposal, here are the steps you can take to address the problem:
- Turn Off Power: Before you begin any work on the garbage disposal, ensure the power supply is switched off. This is crucial for your safety.
- Diagnose the Leak: Follow the steps mentioned earlier to diagnose the source of the leak. This includes drying the area, turning the power back on (if needed), and running water to identify the location of the leak.
- Tighten Loose Connections: If you find that the leak is coming from a loose connection, use the appropriate tools to tighten it. This may involve securing the mounting, plumbing joints, or fasteners.
- Replace Seals: If worn-out or damaged seals are the cause of the leak, follow the steps described earlier to replace them. This involves disassembling the unit, identifying the damaged seals, and installing new ones.
- Patching Cracks: If the housing of the disposal has cracks, temporary patching can be done using epoxy putty or a plumber’s putty. Follow the steps outlined in the previous response for patching cracks.
- Prevent Corrosion: To prevent future corrosion and maintain the health of your garbage disposal, practice regular cleaning methods using items like ice cubes, citrus fruit peels, baking soda, and vinegar.
- Seek Professional Help: If you’ve tried the above steps and the leak persists, or if you encounter electrical problems, structural damage, or feel unsafe during the process, it’s advisable to seek professional assistance. A licensed plumber or appliance repair technician can diagnose and fix the issue correctly.
Remember that a reset button is unrelated to leaks from the bottom of a garbage disposal. Focus on identifying the source of the leak and following the appropriate steps to address it. Prioritize safety throughout the process by turning off the power supply when necessary.
Garbage Disposal Leaking From Top
If your garbage disposal is leaking from the top, it’s important to address the issue promptly to prevent further damage and potential safety hazards. Here are the steps to take if your garbage disposal is leaking from the top:
- Turn Off Power: First and foremost, ensure that the power supply to the garbage disposal is turned off. This is crucial for your safety when working on any electrical appliance.
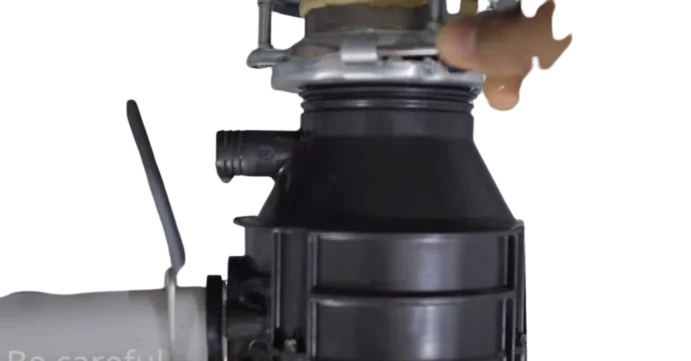
- Identify the Source of the Leak: Before you can fix the issue, you need to pinpoint where the leak is originating from. Examine the top of the disposal unit and the surrounding areas to locate the source of the leak. Common areas to check include:
- Sink Flange: Inspect the seal between the sink and the garbage disposal unit, known as the sink flange. If this seal is compromised or damaged, it can lead to leaks.
- Mounting Bolts: Check the mounting bolts that secure the disposal unit to the sink. If they are loose or damaged, they can cause leaks.
- Dishwasher Hose Connection: If your dishwasher is connected to the garbage disposal, inspect the connection point for any leaks.
- Internal Components: In some cases, leaks may originate from inside the disposal unit, such as a cracked housing. If you suspect internal issues, it’s best to consult a professional plumber or appliance repair technician.
- Tighten or Replace the Sink Flange Seal: If the leak is originating from the sink flange seal, you can try tightening the mounting screws that hold the disposal unit in place. If this doesn’t resolve the issue, you may need to replace the sink flange gasket. To do this:
- a. Remove the disposal unit from its mounting bracket beneath the sink.
- b. Access the sink flange and remove the old gasket.
- c. Install a new gasket, ensuring it is seated properly.
- d. Reattach the disposal unit to the mounting bracket, securing it with the mounting screws. Tighten them evenly to create a watertight seal.
- Check and Tighten Mounting Bolts: If the leak is coming from the mounting bolts, you can attempt to tighten them. Use an appropriate wrench or pliers to snugly secure the mounting bolts. Be cautious not to overtighten, as this can cause damage.
- Inspect the Dishwasher Hose Connection: If the leak is at the dishwasher hose connection, examine the connection for any loose or damaged components. Tighten the hose clamp or replace it if necessary.
- Run Water to Test: After making any adjustments or replacements, turn the power supply back on and run water through the disposal unit to check for leaks. Monitor the area closely to ensure the issue is resolved.
- Seek Professional Help: If you are unable to identify the source of the leak, or if the leak persists after attempting the above steps, it’s advisable to seek professional assistance. A licensed plumber or appliance repair technician can diagnose the problem accurately and provide the necessary repairs.
Addressing a leak from the top of your garbage disposal promptly can prevent water damage to your kitchen and ensure the continued functionality of the unit. Remember to prioritize safety by turning off the power supply before working on the appliance.
Conclusion
A leaking garbage disposal can quickly turn a kitchen into a chaotic mess, but with the right steps, it’s a problem that can be efficiently resolved. By identifying the source of the leak, whether it’s loose connections, damaged seals, or even cracks in the housing, you can take targeted actions to address the issue. Timely maintenance and occasional checks can help prevent leaks, ensuring that your garbage disposal continues to play its vital role in keeping your kitchen clean and waste-free.
Remember, safety is paramount when dealing with a malfunctioning garbage disposal. Always start by turning off the power supply to avoid electrical accidents. If the problem persists or seems complex, don’t hesitate to seek professional assistance. A well-maintained garbage disposal not only contributes to a cleaner and more efficient kitchen but also extends the lifespan of this essential appliance, making your daily culinary tasks smoother and more convenient.
FAQs (Frequently Asked Questions)
Q: What are the common signs of a leaking garbage disposal?
A: Common signs of a leaking garbage disposal include water pooling beneath the unit, dampness or water stains in the cabinet beneath the sink, and visible dripping or moisture around the disposal.
Q: Can I fix a leaking garbage disposal myself?
A: Yes, you can often address simple leaks, such as loose connections or worn-out seals, by following safety precautions and using basic tools. However, if you are unsure or if the issue persists, it’s advisable to seek professional assistance.
Q: How can I prevent leaks in my garbage disposal?
A: To prevent leaks, regularly inspect your disposal for loose connections, practice proper maintenance, avoid overloading the unit with large quantities of food waste, and be cautious with hard or fibrous items that may damage the disposal.
Q: Is a leaking garbage disposal a serious issue?
A: While some leaks can be minor and easily fixed, it’s essential to address them promptly. Ignoring leaks can lead to water damage, unpleasant odors, and potential damage to the disposal unit itself. So, it’s best to resolve leaks as soon as they are detected.
Q: When should I consider replacing my garbage disposal instead of repairing it?
A: If your garbage disposal experiences frequent and extensive leaks, has a cracked housing, or is an older unit nearing the end of its lifespan, it may be more cost-effective to replace it rather than continually repairing it. A professional can help you make an informed decision based on your specific situation.

With over 8 years of plumbing experience, I am your go-to professional for all your garbage disposal needs. I specialize in garbage disposal systems. My mission is to assist and educate you through this website, offering top-notch plumbing solutions for a cleaner, more efficient home.